


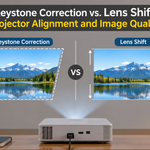

You unbox a new projector, place it on the coffee table, point it at the wall, and the picture comes out looking like a lopsided trapezoid. Almost every projector owner meets this problem sooner or later. The good news is that two different technologies exist to fix it: keystone correction and lens shift. The bad news is that spec sheets mention both, and many buyers do not realise that they work in completely different ways and give very different picture quality.
In this guide, you will learn exactly what each feature does, how they affect sharpness, brightness and resolution, and which one you should prioritise based on how and where you plan to use your projector. By the end, you will be able to read any projector specification sheet with confidence and avoid paying for a feature you do not need.
Quick Answer
- Keystone correction is mostly a software trick. It reshapes the image digitally so a tilted projector still shows a rectangle. It is convenient and found on almost every projector, but it can reduce sharpness and brightness.
- Lens shift is an optical feature. It physically moves the lens (or the lens elements) so the image moves on the screen without any distortion and without any loss of resolution. It is more expensive and usually found on mid-range and premium models.
- Best result: place the projector as square to the screen as possible, use lens shift for positioning if you have it, and use keystone only for small final corrections.
What Is the Keystone Effect?
The keystone effect is the distortion you see when a projector is not perfectly perpendicular to the screen. Light leaves the lens in a cone. If the lens points straight at the screen, every part of that cone travels the same distance and the picture lands as a clean rectangle. If the projector sits low and points upward, the top of the image travels farther than the bottom, so the top becomes wider and the whole picture turns into a trapezoid. The same thing happens sideways if the projector sits off to the left or right and points at an angle.
The name comes from the keystone, the wedge-shaped stone at the top of an arch, which has the same tapered shape as the distorted picture.

You can fix keystone distortion in three ways: physically move the projector until it is square to the screen, use digital keystone correction, or use optical lens shift. The first option is always ideal, but real rooms rarely allow it. Furniture, ceiling heights and seating positions force compromises, and that is where the two features in this article come in.
What Is Keystone Correction?
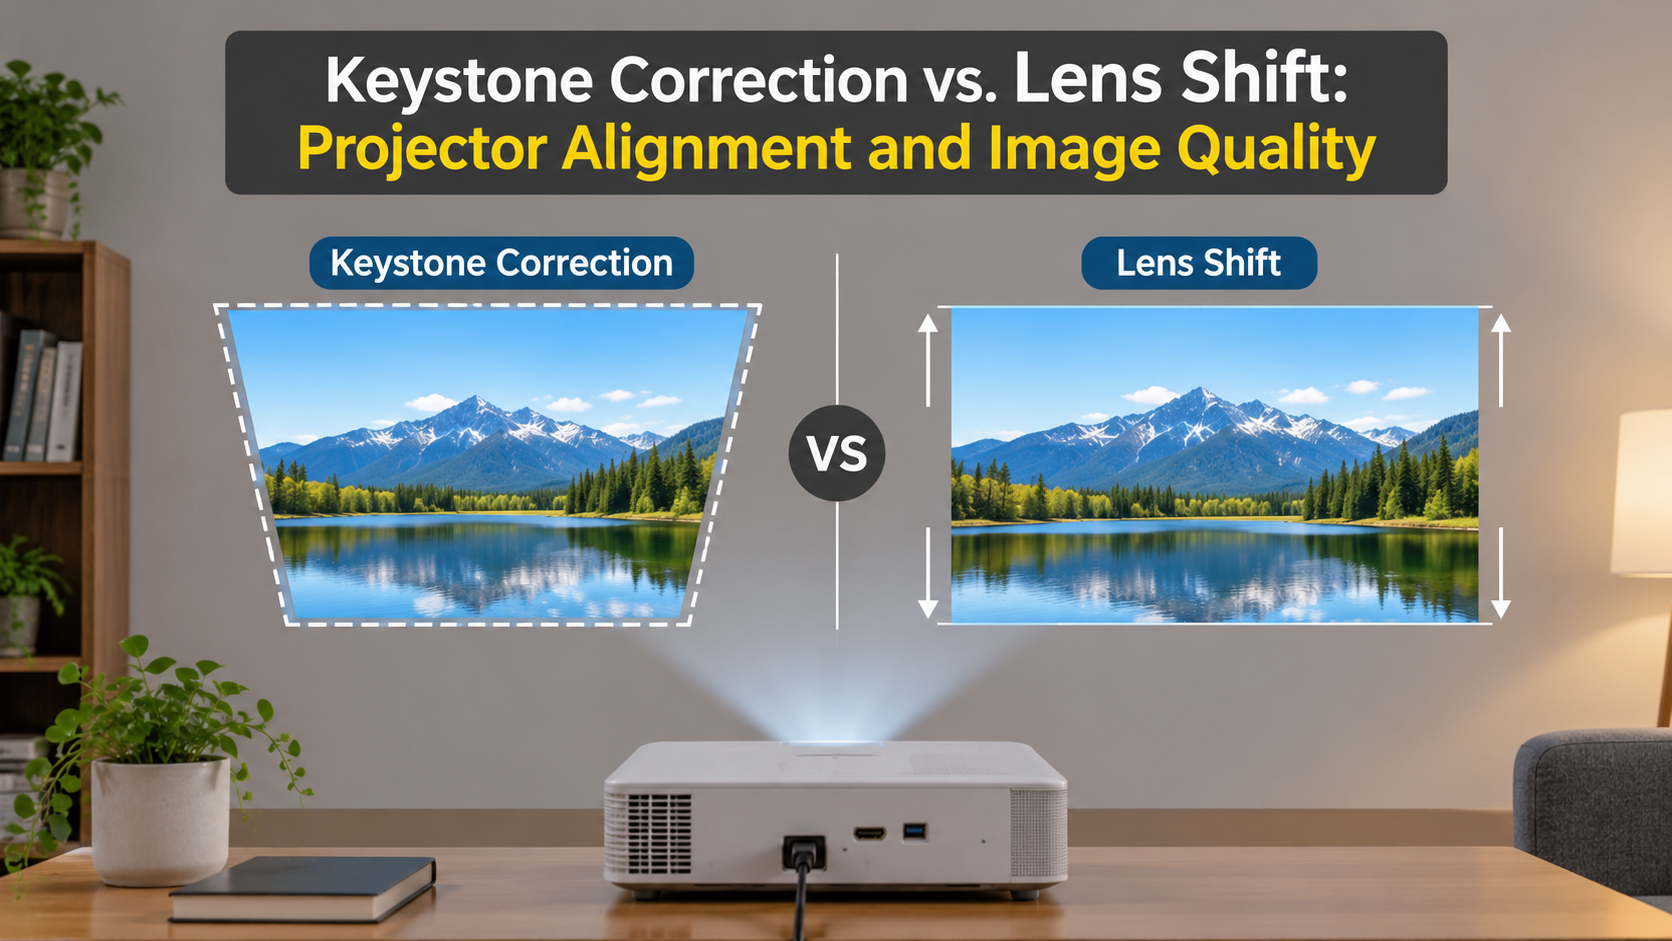
Keystone correction is a digital image-processing feature. When you tilt the projector, the processor deliberately warps the picture in the opposite direction, shrinking the side that would otherwise appear too wide. The two distortions cancel each other out, and what lands on the screen looks rectangular again.
Types of Keystone Correction
- Vertical keystone: corrects distortion caused by tilting the projector up or down. This is the most common type and is available on nearly all models.
- Horizontal keystone: corrects distortion when the projector sits off to one side of the screen. Many mid-range models include it, while some budget models do not.
- Four-corner (2D) keystone: lets you drag each corner of the image independently. It is the most flexible option and is useful for awkward angles or slightly uneven walls.
- Auto keystone: uses internal sensors or a camera to detect the angle and correct the image automatically. It is especially popular on portable and smart projectors that get moved often.
The correction range varies by model. Many projectors offer vertical correction somewhere between roughly 15 and 40 degrees, though you should always check the exact figure in the specification sheet rather than assuming.
The Hidden Cost of Digital Keystone
Keystone correction is convenient, but it is not free. To pre-warp the picture, the projector has to squeeze the image into a smaller, trapezoid-shaped area of its internal display chip. That means some of the chip’s pixels are simply not used, and the remaining pixels must be re-scaled to fit the new shape.

In practice, this can lead to several visible side effects:
- Reduced sharpness: re-scaling can soften fine detail, and small text may look slightly blurry.
- Jagged or wavy edges: straight lines such as window frames, subtitles or spreadsheet gridlines can show stair-stepping or ripples.
- Lower brightness: using fewer pixels means less of the lamp or laser output reaches the screen, and brightness may become slightly uneven across the image.
- Possible extra processing delay: on some models, the correction can add a small amount of input lag, which matters to gamers.
The stronger the correction, the more noticeable these effects become. A tiny adjustment of a few degrees is usually hard to notice, while a large correction can clearly degrade the picture.
What Is Lens Shift?
Lens shift is an optical feature that physically moves the lens, or part of the lens assembly, up, down, left or right relative to the display chip. Because the projector body stays level and square to the screen, the light still travels equal distances to every part of the image. The picture therefore moves up or down on the wall, but it never becomes distorted.
The easiest way to understand it is to imagine a camera with a shift lens used by architects. They can frame the top of a tall building without tilting the camera upward, which keeps the vertical lines straight. A projector with lens shift works on the same principle in reverse.

How Lens Shift Range Is Measured
Manufacturers usually state the lens shift range as a percentage of the image height (for vertical shift) or image width (for horizontal shift). A vertical range of plus or minus 50 percent, for example, means the image can be moved up or down by up to half of its own height from the centre position. The bigger the percentage, the more freedom you have when choosing where to put the projector.
Manual vs Motorised Lens Shift
- Manual lens shift: you turn physical dials on the projector. It is simple, reliable and common on mid-range models.
- Motorised lens shift: you adjust the lens with a remote control, and premium models can even store lens positions in memory. This is especially useful for people who switch between aspect ratios or screen sizes.
Limitations of Lens Shift
- Higher price: the extra lens hardware makes projectors with optical lens shift more expensive, so it is mainly found on mid-range and premium models rather than entry-level ones.
- Larger and heavier body: the lens assembly needs room to move, so these projectors are generally less compact than pocket-sized models.
- Limited range: it can only shift the image within its stated range, so it cannot rescue a projector placed at a seriously wrong angle.
- Edge performance at extremes: on some models, pushing the lens to the very end of its range can make the corners slightly softer than the centre.
Keystone Correction vs Lens Shift: Side-by-Side Comparison
| Feature | Keystone Correction | Lens Shift |
|---|---|---|
| How it works | Digitally warps the image in software | Physically moves the lens optically |
| Image quality | Can reduce sharpness and effective resolution | No quality loss |
| Brightness | May drop slightly as pixels go unused | Unaffected within the normal range |
| Distortion fixed | Trapezoid shapes from tilt and angle | Prevents distortion by repositioning the image |
| Flexibility | Works with almost any placement within its angle range | Limited to the stated shift range |
| Typical availability | Almost every projector, including budget and portable models | Mostly mid-range and premium projectors |
| Price impact | Low (software feature) | Higher (extra optical hardware) |
| Best for | Portable use, temporary setups, small adjustments | Permanent installs, ceiling mounts, home theatres |
Which One Do You Need? Match the Feature to Your Setup
Permanent Home Theatre or Ceiling Mount
If the projector will sit in one place for years, lens shift is the better investment. You position the projector once, adjust the image with the dials, and enjoy the full native resolution every time you watch. Ceiling mounts in particular benefit, because the projector is far above the screen centre and needs a large vertical offset.
Coffee Table or Shelf Setup
If the projector sits on a table or shelf below the screen, you need to push the image upward. Lens shift does this cleanly. If your model only has keystone, keep the correction as small as possible by raising the front of the projector with a stand or books so that it points only slightly upward.
Portable Projectors and Outdoor Movie Nights
Portable models move around constantly and rarely include lens shift because it adds size and weight. Here, auto keystone is a genuine convenience. You can set the projector on a bag, a car bonnet or a picnic table, and the picture straightens itself in seconds. Just accept that perfect sharpness is a lower priority for casual viewing.
Classrooms and Business Presentations
Text-heavy slides and spreadsheets expose the weaknesses of digital keystone. Small fonts can look uneven after heavy correction. For a fixed meeting room, a model with lens shift or at least a gentle mount angle will deliver clearer text. For travelling presenters, a small keystone correction is usually an acceptable trade-off.
Gaming
Gamers care about both sharpness and response time. Digital correction can sometimes add processing delay, and some projectors disable keystone in their low-latency game modes. If you game a lot, position the projector square to the screen, or choose a model with lens shift so that you never need to rely on digital correction.
Can You Use Both Together?
Yes, and many experienced users do exactly that. The best workflow is to treat lens shift as your main positioning tool and keystone as the fine-tuning tool. Use lens shift to move the image to the correct height and side position. If a tiny trapezoid remains because the projector is slightly rotated, apply a small keystone adjustment to tidy it up. Because the correction is small, the quality penalty is usually negligible.
How to Set Up Your Projector for the Best Picture
- Measure first. Check your projector’s throw ratio and your screen size to find the right distance. This decides where the projector should sit before you touch any correction setting.
- Place the projector as square as possible. Aim for the lens to be centred on the screen horizontally and as close to the screen’s vertical centre or edge as the model’s design allows.
- Zoom and focus. Set the zoom so the picture fills the screen, then focus on small text or a test pattern.
- Use lens shift if available. Move the image up, down or sideways until it sits perfectly within the screen borders.
- Apply keystone only to finish. Use the smallest keystone adjustment needed to make the edges parallel to the screen frame.
- Refocus. Always focus again after correcting the geometry, because changes in angle can shift the focal plane.
What to Check Before You Buy
When you compare projectors, do not just look for the word “keystone” in the feature list, because almost every model has it. Instead, look deeper at these points:
- Lens shift type and range: check whether it is optical, whether it is vertical, horizontal or both, and how large the percentage range is.
- Keystone range and type: note the degree range, and check whether the model offers horizontal, four-corner or automatic correction.
- Throw ratio and zoom: these decide how far from the screen you can place the projector for your target image size.
- Native resolution: a native 1080p or 4K panel loses less visible detail from small corrections than a lower-resolution panel.
- Brightness rating: a brighter projector can better absorb the slight brightness loss from digital correction, especially in rooms with some ambient light.
- Mounting flexibility: check whether the projector supports ceiling, table and tripod mounting with good tilt control.
- Input lag in game mode: read reviews to see whether corrections stay active in low-latency modes.
Common Mistakes to Avoid
- Relying on keystone to fix a bad placement. Heavy correction visibly softens the picture, so physically reposition the projector whenever you can.
- Assuming lens shift is the same as zoom. Zoom changes the image size, while lens shift changes the image position. They solve different problems.
- Ignoring horizontal alignment. A projector that is rotated left or right also causes distortion, and lens shift only helps if the unit actually has horizontal shift.
- Not refocusing after adjustment. Corners can look soft simply because focus was set before the final geometry changes.
- Paying for features you will not use. If your projector will live on a table and you only need a small tweak, a good keystone system is often enough.
Frequently Asked Questions
Is lens shift better than keystone correction?
For picture quality, yes. Lens shift repositions the image optically, so there is no resolution loss and no digital distortion. However, keystone correction is far more common, cheaper and works well for small adjustments, so the better choice depends on your budget and your room.
Does keystone correction reduce picture quality?
It can. Digital keystone re-scales the image and leaves part of the display panel unused, which may soften details and lower brightness. The effect is small for minor adjustments and more noticeable for large ones.
Do I need lens shift if I ceiling-mount my projector?
It is strongly recommended. A ceiling-mounted projector sits well above the screen, so lens shift lets you push the image downward onto the screen without tilting the projector. Without it, you will depend on heavy keystone correction or on a mount that tilts the projector.
Is lens shift the same as zoom?
No. Zoom enlarges or shrinks the picture, while lens shift moves the picture up, down, left or right. Many projectors offer zoom, but only some provide lens shift.
What is the difference between auto keystone and manual keystone?
Both use the same digital correction technique. Auto keystone detects the projector’s angle with sensors or a camera and applies the correction by itself, while manual keystone requires you to adjust the values through the menu. Auto is faster for portable use, while manual gives you precise control.
Can I use a projector without any keystone correction or lens shift?
Yes, as long as you can place it perfectly square to the screen with the image landing at the right height. Many installers achieve this with a carefully positioned mount or a custom stand. It just leaves less room for error.
Final Verdict
Keystone correction and lens shift both solve the same visible problem, but they do it in very different ways. Keystone correction is the flexible, affordable, software-based fix that works on almost every projector and is perfect for portable setups and small adjustments. Lens shift is the premium, optical solution that keeps every pixel and every lumen intact, which makes it the smart choice for permanent installations and demanding viewers.
If you can afford it and your room needs it, choose a projector with lens shift and use keystone only for tiny final touches. If you want a budget-friendly or portable model, pick one with good auto keystone and a strong native resolution, and take a few minutes to position it as straight as you can. Either way, understanding the difference puts you in control of both your purchase and your picture quality.